How to record MIDI tracks from the YAMAHA Genos with Reaper. Reaper is the best DAW for audio recording studios on a budget. Let’s get started.
Windows 10 Audio Interface Setup
The audio interface used for this setup is the Behringer Uphoria 400HD and for a chance, the operating system is Windows 10. Regardless of what audio interface you have, the configuration is identical on all of them. Typically, a USB cable connects the device to the computer. Keep in mind that all information travels via this USB cable into your computer.
Connecting an audio interface is straight forward. Once the USB cable is plugged in and the audio interface is turned on, it’s time to load Raper. The very first time Reaper loads, it will ask which device it is using so the audio interface needs to be specified. This is done via:
Options > Preferences > Audio > Device.
For Windows 10 users, the drop-down needs to show ASIO and below that, the ASIO driver must be UMC ASIO Driver.
If you record audio, then enable inputs first 1, last 4 and the same for the outputs. This way, you can chose between the four inputs when the track records audio. This is useful for multi-mic setups such as recording a drum set etc.
There is no need to connect any MIDI cables from the Genos to the audio interface because, as I already mentioned, the data (MIDI information) flows via the USB cable.
Configuring Reaper for Genos MIDI recording
There are two ways to achieve results. The easier one is to just record a MIDI file on the Geons and export it to a USB stick. That file then can be easily loaded into reaper for further editing. But often this doesn’t work so let’s properly set up Reaper to receive all 16 MIDI channels from the Yamaha Genos.
Here are the steps to make 16 tracks which, if you save it before you record, can serve as a template for future project.
- Add 16 tracks
- Click the track audio meter
- From the pop-up, select:
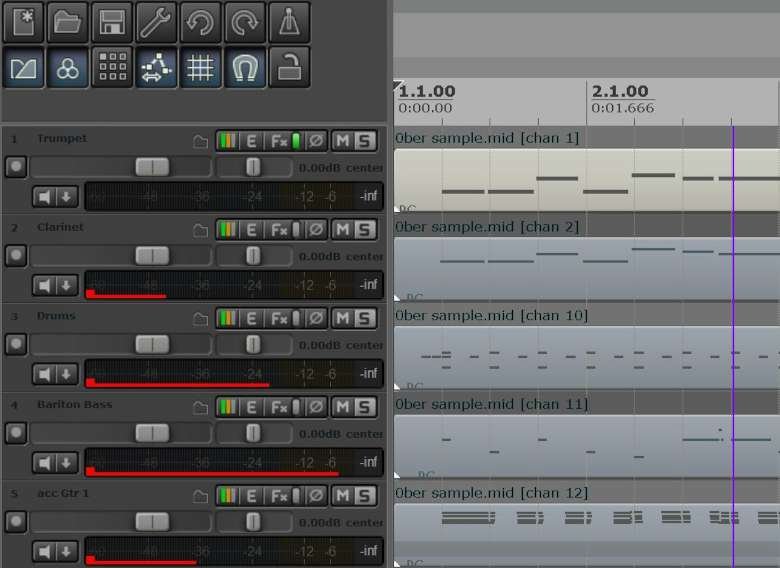
Input MIDI > Genos MIDI > Channel 1
Repeat this for all channels and increase the MIDI channel to reflect the track number. Track 2 needs to be assigned to MIDI channel 2 and so on. Also, in order to pick “Genos MIDI”, you need to enable name your device the the settings. By default, all devices are off. Again, this only has to be done once and Reaper will remember it. To enable Genos MIDI, go to: Options > Preferences > Audio > MIDI Devices and double click the ones that say Workstation in / out. Overwrite Workstation with Genos and you are all set.
Once the MIDI channels have been set for all 16 tracks, it’s time to save the file so that it can serve as a start-up template. Now, Reaper listens to everything we play on the Genos. Styles or just voices, it doesn’t matter. You can go ahead and do a test recording by pressing the record button on the first track and play a few notes.
How to configure the MIDI output
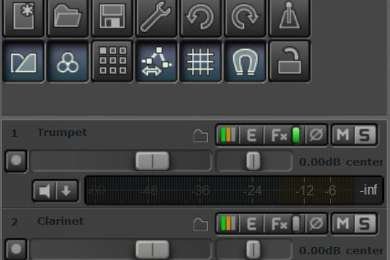
Although we have recorded some information, Reaper does not jet know where to send it. Scroll up to the picture and find the M and S buttons (Mute / Solo). To the left of those buttons is a colored one. Click that and a new windows opens which, on the right side, has a drop-down option from which Workstation (or Genos) OUT needs to be selected.
Again, this needs to be done for all tracks and the file should be saved as a second template for future use.
Now Reaper is ready to record and play back everything Genos sends to the computer. At first, all of this seems complex and for an hour or more, it will seem confusing and frustrating. Don’t give up. If it doesn’t work, start a new project and redo the steps. Configuring the Yamaha Genos to record MIDI and audio signals with Reaper is like learning a new tune. At first it sounds a little off but after a few tries, it starts to come together. Don’t give up. It works and once you record a few tunes, you will do all of this without thinking.
Yamaha Genos Program Changes
MIDI is an old protocol and back in the days when it was invented, instruments like the Yamaha DX 7 had 32 or 64 patches. Well, things have changed. Today’s instruments have 1000’s of patches (sounds) and to call those up, instrument manufactures take advantage of MSB, LSB and lastly our familiar PG (program change) #s.
There are some sites which offer a free download of the Yamaha Genos data list which is a PDF document with all the settings. All we need from this list are the MSB, LSB and PG#s and we are all set.
How to specify a patch from within Reaper
Unlike other DAWs, Reaper solved viewing MIDI data nicely. After a MIDI track is recorded, we can double-click it to open the MIDI editor. Again, if this is the first time you do this then be patient. There are a lot of options and in time we need most of them. In the left upper corner are four buttons. The first one looks like a keyboard and the last one like a treble clef. Click the third one to see all MIDI events that were just recorded.
If a recording was made on the Genos and imported via USB stick then all of the program and control change numbers will be visible at the beginning of each track. If a recording is made from scratch, then we need to add the MSB, LSB and PG# manually. Reaper makes this really easy. The MIDI edit sheet has a button in the left lower corner which needs to be set to Bank/Program Select. Now we can enter a new value by double-clicking at the right field next to the Bank/Program Select button. This will open a new window that lets us select the midi channel, MSB, LSB and PG#. Once entered, that track will always play that instrument.
If a recording is made from the Geons that uses a style then it’s best to delete the empty tracks. Doing so makes editing less cumbersome. All in all, that’s about it. If you have questions, I’m happy to answer. Obviously, a blog post can not address each and every step like a book can but still, the steps mentioned will be enough to help with further YouTube searches if needed.
Recommended YouTube video: https://www.youtube.com/watch?v=EZgHHEkFNIs
Thank you for reading and lets have fun composing music with our favorite toy.


